
Considering that we are going to have guests in Chez Wheele in about 20 days, the basement guest room became priority.

Here is a reminder of what it looked like before. Oooh, sexy crushed red velvet... Barf.

And this is what it looks like after!
So how did I get from A to B?
The easiest thing to do is paint, which is exactly what the previous owners did to the cheap and mismatched wood paneling. All I have really done is finesse it a little.
In order to hide where the paneling came together, there was a piece of corner moulding in each corner, but instead of making it look better, it creates shadows and makes it look messy.

Step 1: Remove corner moulding.


Step 2: Use latex caulking (also referred to as painter's caulk) to create a corner. Here is showing the gap left between the paneling, and after the latex caulking is applied.


Painter's caulk is also great for filling holes in paneling and the deeper gaps where panels meet, making them look like another reveal.

Step 3: Paint all walls and new latex caulk locations.
I had an especially cute assistant to help with that.


Step 4: Remove existing curtains and rod and replace with a much longer rod and full length curtains. By extending the rod, it allowed the window to look larger and also helped hide the security hardware around the window and on the wall. Plus it brings texture to an otherwise flat room.


Step 5: Add a shade to the existing bare ceiling fixture. I assume the ceiling once had the standard square glass shade. I had an extra lamp shade and retrofitted it with a few simple materials to accommodate this location. This solution will do for now. (Full disclosure: I needed a large washer to attach the shade, but as most of our things are in boxes still, I used the top of a soup can with a hole in the middle - worked like a charm!)
Step 6: Dress the room!
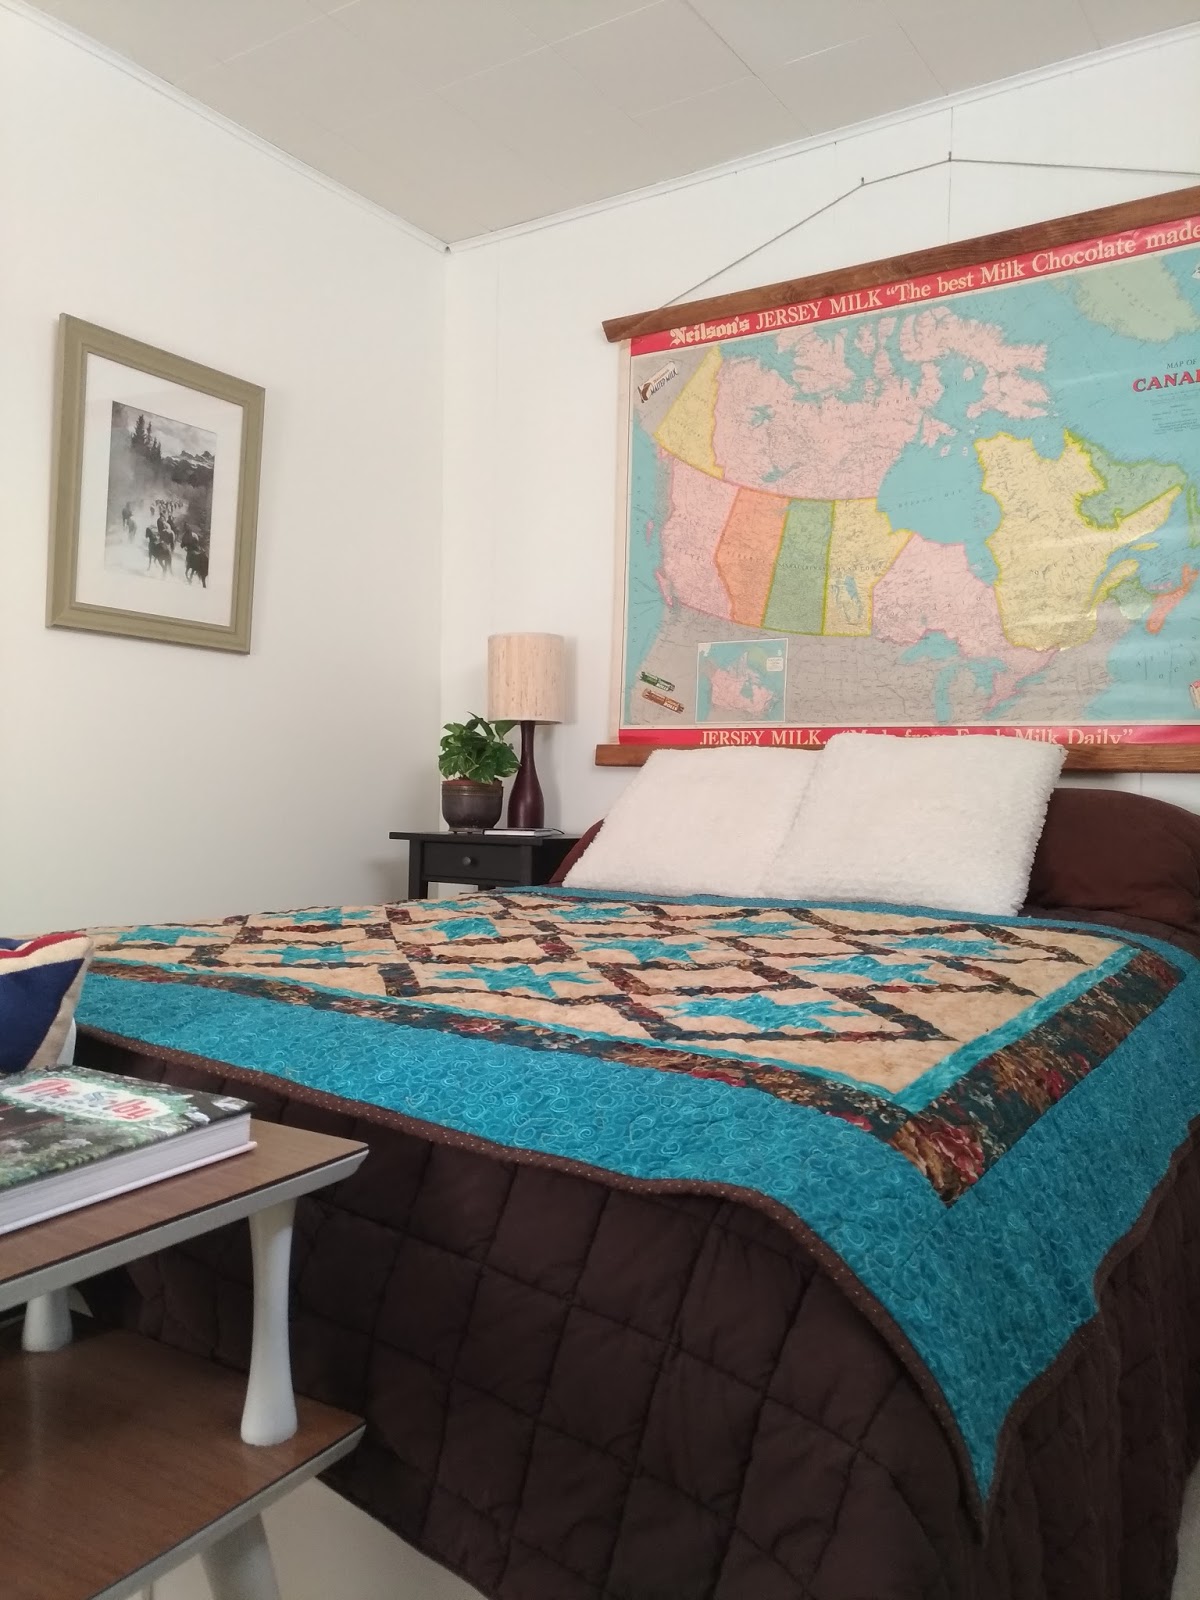
Double bed, Grandma Morley's quilt, a large vintage map, and some artwork bring these white walls to life.

A retro telephone table put at the foot of the bed, you can see the original post here.


A fun cabinet for odds and ends and a mirror that doubles as storage to hold extra pillows and towels.


Add a couple of lamps, and a plant.
Finally, no interior of mine would be complete without a sense of humour: A picture book of 'bad hair' and Ravage the cassette tape Transformer under a cloche.
One day we will get around to adding some base and top moulding to finish the room, but we are definitely off to a great start.
No comments:
Post a Comment
Check us out on Pinterest and Instagram too!